该文件为YD-ESP32-S3-EYE的硬件原理图,可以认为与官方乐鑫ESP32-S3-EYE原理图无异。 |
||
|---|---|---|
| .github/workflows | ||
| components | ||
| default_bin | ||
| docs | ||
| examples | ||
| img | ||
| tools/ci | ||
| .gitignore | ||
| .gitlab-ci.yml | ||
| .gitmodules | ||
| CHANGELOG.md | ||
| LICENSE | ||
| README.md | ||
| README_EN.md | ||
| YD-ESP32-S3-EYE-LCD-SCH.pdf | ||
| YD-ESP32-S3-EYE-SCH.pdf | ||
README_EN.md
ESP-WHO [中文]
ESP-WHO is an image processing development platform based on Espressif chips. It contains development examples that may be applied in practical applications.
Overview
ESP-WHO provides examples such as Human Face Detection, Human Face Recognition, Cat Face Detection, Gesture Recognition, etc. You can develop a variety of practical applications based on these examples. ESP-WHO runs on ESP-IDF. ESP-DL provides rich deep learning related interfaces for ESP-WHO, which can be implemented with various peripherals to realize many interesting applications.

What You Need
Hardware
We recommend novice developers to use the development boards designed by Espressif. The examples provided by ESP-WHO are developed based on the following Espressif development board, and the corresponding relationships between the development boards and SoC are shown in the table below.
| SoC | ESP32 | ESP32-S2 | ESP32-S3 |
|---|---|---|---|
| Development Board | ESP-EYE | ESP32-S2-Kaluga-1 | ESP-S3-EYE |
Using a development board not mentioned in the table above, configure pins assigned to peripherals manually, such as camera, LCD, and buttons.
Software
Get ESP-IDF
ESP-WHO runs on ESP-IDF. For details on getting ESP-IDF, please refer to ESP-IDF Programming Guide.
Please use the latest ESP-IDF on the release/v4.4 branch.
Get ESP-WHO
Run the following commands in your terminal to download ESP-WHO:
git clone --recursive https://github.com/espressif/esp-who.git
Remember to use
git submodule update --recursive --initto pull and update submodules of ESP-WHO.
Run Examples
All examples of ESP-WHO are stored in examples folder. Structure of this folder is shown below:
├── examples
│   ├── cat_face_detection          // Cat Face Detection examples
│   │   ├── lcd                     // Output displayed on LCD screen
│   │   ├── web                     // Output displayed on web
│   │   └── terminal                // Output displayed on terminal
│   ├── code_recognition            // Barcode and QR Code Recognition examples
│   ├── human_face_detection        // Human Face Detection examples
│   │   ├── lcd
│   │   ├── web
│   │   └── terminal
│   ├── human_face_recognition      // Human Face Recognition examples
│   │   ├── lcd
│   │   ├── terminal
│   │   └── README.md               // Detailed description of examples
│   └── motion_detection            // Motion Detection examples
│       ├── lcd
│       ├── web
│       ├── terminal
│       └── README.rst
For the development boards mentioned in Hardware, all examples are available out of the box. To run the examples, you only need to perform [Step 1: Set the target chip] (#Step-1 Set the target chip) and [Step 4: Launch and monitor] (#Step-4 Launch and monitor).
Step 1: Set the target chip
Open the terminal and go to any folder that stores examples (e.g. examples/human_face_detection/lcd). Run the following command to set the target chip:
idf.py set-target [SoC]
Replace [SoC] with your target chip, e.g. esp32, esp32s2, esp32s3.
NOTE: we implement examples of target chip esp32s3 with ESP32-S3-EYE by defaults. So that flash and monitor are through USB. If you are using other board, please confirm which method you will use first,
- If by USB, just keep it in defaults,
- If by UART, set it in menuconfig.
(Optional) Step 2: Configure the camera
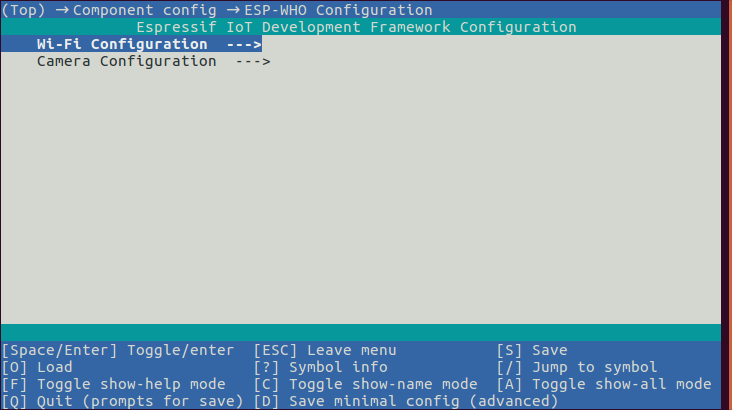
If not using the Espressif development boards mentioned in Hardware, configure the camera pins manually. Enter idf.py menuconfig in the terminal and click (Top) -> Component config -> ESP-WHO Configuration to enter the ESP-WHO configuration interface, as shown below:
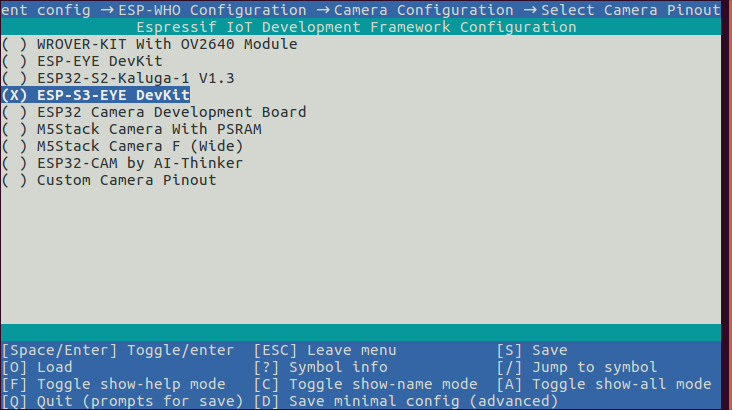
Click Camera Configuration to select the pin configuration of the camera according to the development board you use, as shown in the following figure:
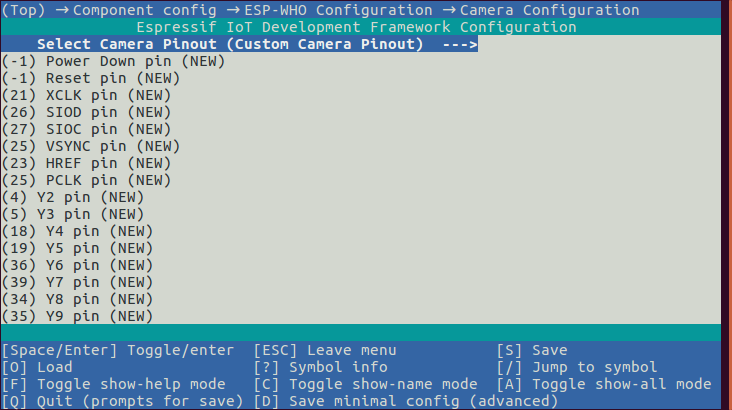
If the board you are using is not shown in the figure above, please select Custom Camera Pinout and configure the corresponding pins correctly, as shown in the following figure:
(Optional) Step 3: Configure the Wi-Fi
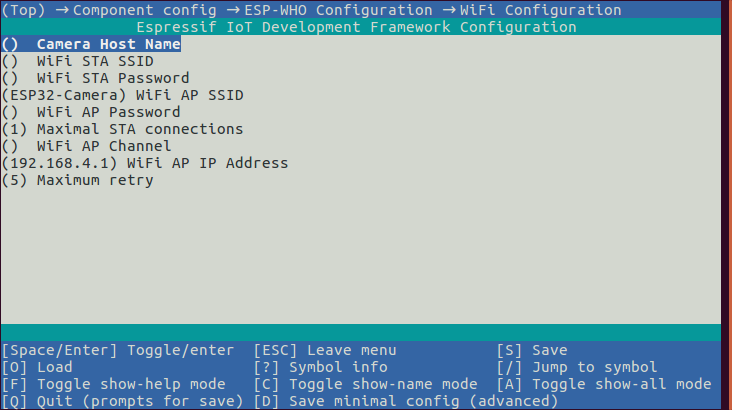
If the output of example is displayed on web server, click Wi-Fi Configuration to configure Wi-Fi password and other parameters, as shown in the following figure:
Step 4: Launch and monitor
Flash the program and launch IDF Monitor:
idf.py flash monitor
Default Binaries of Development Boards
The default binaries for each development board are stored in the folder default_bin. You can use Flash Download Tool (https://www.espressif.com/en/support/download/other-tools) to flash binaries.
Feedback
Please submit an issue if you find any problems using our products, and we will reply as soon as possible.


